
Juki MO-6716S Tension Adjustment: A Comprehensive Guide
Navigating the Juki MO-6716S serger demands precise tension control for optimal stitch quality.
Resources detail adjustments for the upper looper, lower looper, and needle tensions.
Understanding safety stitch tension is crucial, alongside troubleshooting common issues.
Threading errors significantly impact tension, requiring careful attention to detail.
Furthermore, differential feed and stitch length influence tension, demanding coordinated adjustments.
Oil changes and routine maintenance contribute to consistent performance and reliable tension settings;
The Juki MO-6716S is a high-performance serger renowned for its speed, reliability, and ability to handle a wide range of fabrics. This industrial-grade machine is a favorite among seamstresses, quilters, and apparel manufacturers alike, offering professional-quality seams with ease. However, achieving optimal results hinges on a thorough understanding of its features, particularly the intricate tension system.
Mastering tension adjustment on the MO-6716S is paramount to preventing issues like puckering, looping, or uneven stitches. The serger utilizes multiple looper and needle tensions that must be balanced for each fabric type and thread combination. Proper tension ensures a clean, balanced stitch, enhancing the durability and aesthetic appeal of your projects.
This comprehensive guide will delve into the nuances of Juki MO-6716S tension adjustment, providing step-by-step instructions and troubleshooting tips. We will explore each tension dial, its function, and how to fine-tune it for various sewing applications. From basic adjustments to advanced techniques, this resource aims to empower you to unlock the full potential of your Juki MO-6716S serger.
Understanding Serger Tension
Serger tension isn’t a single setting, but a delicate balance between the needle, upper looper, and lower looper. Each component plays a vital role in forming a secure and aesthetically pleasing seam. The needle tension primarily controls the stitch formation, while the loopers interlock the threads to create the overlock edge.
Incorrect tension leads to several common problems. Too much needle tension can cause the fabric to pucker, while too little results in loose, loopy stitches. Imbalanced looper tensions can create uneven edges or thread breakage. Understanding how each tension dial affects the stitch is crucial for effective adjustment.
Generally, a balanced tension means the stitches lie flat and even on both sides of the fabric. The threads should interlock seamlessly without any visible loops or puckering. Achieving this balance requires experimentation and a keen eye; Factors like thread type, fabric weight, and stitch length all influence the ideal tension settings, demanding a tailored approach for each project.
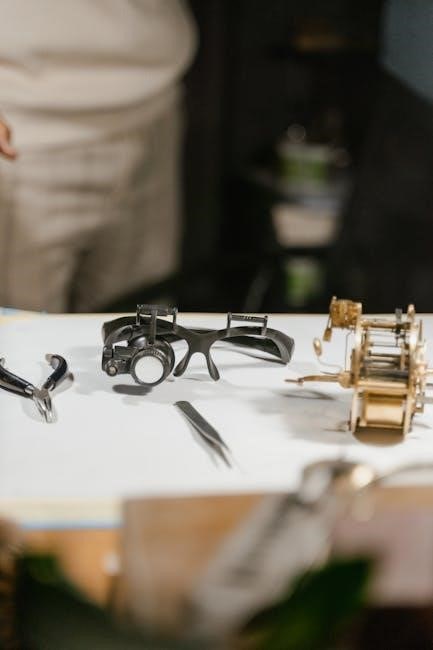
Tools Required for Tension Adjustment
Successfully adjusting the Juki MO-6716S serger tension requires a minimal, yet essential, toolkit. First and foremost, you’ll need a small screwdriver – often a flathead – to manipulate the tension dial screws. Ensure it’s the correct size to avoid damaging the delicate adjustment mechanisms.
Scrap fabric, identical to the material you’ll be working with, is indispensable for testing adjustments. This allows you to visualize the impact of each change without wasting your project fabric. A seam ripper is equally vital for quickly correcting mistakes and re-threading if necessary.
Good lighting is often overlooked, but crucial for accurately assessing stitch quality and identifying tension issues. Finally, a magnifying glass can be helpful for inspecting fine details, particularly when examining thread paths and looper alignment. Having these tools readily available streamlines the adjustment process and ensures precise results.
Identifying Tension Issues

Recognizing tension problems on the Juki MO-6716S is the first step towards a solution. Loopy stitches are a common indicator – loops on the top signify needle or upper looper tension issues, while loops on the bottom suggest lower looper tension problems. Puckering along the seam indicates overly tight tension, causing the fabric to gather.
Broken threads during serging frequently point to excessive tension, stressing the thread beyond its limit. Conversely, uneven stitches or thread nests underneath the fabric often result from loose tension. A missed stitch can also signal incorrect tension settings, preventing proper loop formation.
Carefully observe the stitch formation; is it balanced, or does one thread dominate? Examining the fabric’s behavior – whether it’s stretching, puckering, or lying flat – provides valuable clues. Consistent observation and a methodical approach are key to accurately diagnosing the root cause of the tension imbalance.

Adjusting the Upper Looper Tension
To adjust the upper looper tension on the Juki MO-6716S, locate the corresponding tension dial, typically color-coded. Start with a small adjustment – a quarter turn clockwise to increase tension, or counterclockwise to decrease it. Always test the changes on a scrap of the fabric you’re using for your project.
If you observe loops on the top of the fabric, slightly increase the upper looper tension. Conversely, if the thread is breaking or the fabric is puckering, reduce the tension. Remember that tension adjustments are interconnected; a small change here can affect the other loops.
Fine-tune the tension until the upper looper thread interlocks smoothly with the needle and lower looper threads, creating a balanced and even stitch. Avoid making drastic adjustments, as this can lead to further imbalances. Document your settings for future reference, ensuring consistent results.
Adjusting the Lower Looper Tension
The lower looper tension on the Juki MO-6716S is critical for forming a secure and balanced overlock stitch. Locate the lower looper tension dial – often a different color than the upper looper’s – and prepare to make incremental adjustments. Begin by testing on a scrap of your project fabric.
If the fabric exhibits loose loops on the underside, increase the lower looper tension slightly. Conversely, if the lower looper thread breaks frequently or the fabric is gathering, reduce the tension. Pay close attention to how the stitch forms; a balanced stitch will have even thread distribution.
Adjustments to the lower looper tension often require smaller increments than the upper looper or needle tensions. Remember to re-thread the looper if you encounter persistent issues. Document your successful settings for consistent results on future projects, ensuring a professional finish.
Adjusting the Needle Tension
The needle tension on the Juki MO-6716S directly impacts the stitch formation and fabric balance. Locate the needle tension dial, typically marked with numbers, and prepare for precise adjustments. Start with a scrap of your project fabric to test changes effectively.
If the fabric puckers or waves, indicating too much tension, slightly decrease the needle tension. Conversely, if the needle thread loops or the seam appears loose, increase the tension incrementally. Observe the stitch closely; a balanced stitch will have even thread interlock.
Adjusting the needle tension often requires small changes, as it significantly affects the overall stitch quality. Ensure the needle is correctly inserted and the thread is properly seated in the tension discs. Record your optimal settings for consistent results, achieving a professional and durable seam;
Safety Stitch Tension Adjustment

The safety stitch, also known as a cover stitch, requires a dedicated tension adjustment on the Juki MO-6716S. This tension controls the looper thread’s coverage over the edge, preventing unraveling and adding a professional finish. Locate the specific dial designated for safety stitch tension – it’s often separate from the main looper tensions.
If the safety stitch appears too tight, causing puckering or broken threads, reduce the tension slightly. Conversely, if the stitch is loose or the looper thread doesn’t fully cover the fabric edge, increase the tension. Test on scrap fabric, observing the stitch’s appearance from both sides.
Proper adjustment ensures a balanced and secure cover stitch. Remember that safety stitch tension interacts with the looper tensions, so minor adjustments to all may be needed. Consistent monitoring and fine-tuning are key to achieving a flawless, durable safety stitch on your projects.
Troubleshooting Common Tension Problems
Uneven stitches are a frequent sign of tension imbalance on the Juki MO-6716S. If the needle thread pulls to one side, adjust the needle tension accordingly – tighten if it’s loose, loosen if it’s tight. Loopy stitches often indicate a looper tension issue; experiment with small adjustments to both upper and lower looper tensions.
Puckering fabric suggests overall tension is too high. Reduce tension on all threads incrementally, testing after each adjustment. Broken threads can stem from excessive tension or incorrect threading. Re-thread the machine carefully, ensuring proper thread paths, and then lower the tension.
Consistent testing on scrap fabric is vital. Remember to note initial settings before making changes, allowing you to revert if needed. Consider thread type and fabric weight, as these factors influence optimal tension settings. Refer to the manual for specific recommendations.
Differential Feed Adjustment and its Impact on Tension
The Juki MO-6716S’s differential feed controls fabric movement, significantly impacting tension. A higher differential feed (over 1) stretches the fabric, potentially requiring looser tension settings to prevent puckering. Conversely, a lower setting (under 1) gathers the fabric, often necessitating tighter tension for a balanced stitch.
When working with stretchy fabrics like knits, a higher differential feed helps prevent wavy seams, but demands careful tension adjustment to avoid loose stitches. For woven fabrics, a lower differential feed or a neutral setting (1) is generally preferred, maintaining fabric stability and requiring standard tension settings.
Adjusting differential feed and tension should be done in tandem. Start with balanced tension, then fine-tune the differential feed to achieve the desired seam appearance. Always test on scrap fabric, observing how changes affect both fabric movement and stitch quality. Small adjustments yield the best results.
Stitch Length and Tension Relationship
The Juki MO-6716S’s stitch length and tension are intrinsically linked; altering one invariably affects the other. A longer stitch length generally requires looser tension settings. This is because a longer stitch consumes more thread, and tighter tension can cause thread breakage or puckering. Conversely, a shorter stitch length often necessitates tighter tension to maintain stitch formation and prevent loops.
When adjusting stitch length, always reassess the tension. If you’re shortening the stitch, incrementally tighten the needle and looper tensions until a balanced stitch is achieved. Conversely, lengthening the stitch usually requires loosening the tensions to avoid pulling or thread issues.
Experimentation is key. Test different stitch length and tension combinations on scrap fabric, observing the resulting seam. Pay attention to stitch density, balance, and overall appearance. Remember that fabric type also influences the ideal settings, requiring further fine-tuning.
Threading Errors and Tension
Incorrect threading is a primary culprit behind tension problems on the Juki MO-6716S. Even a minor deviation from the threading path can disrupt the delicate balance required for proper stitch formation. Ensure each thread is correctly seated in its respective tension disc, and that no thread is caught or obstructed along the way.
Specifically, verify the looper threads are fully inserted into the tension slots; incomplete seating leads to consistently loose loops. The needle thread must pass cleanly through all thread guides, avoiding any snags. Re-thread the entire machine systematically, consulting the manual’s diagrams, if you suspect an error.
Often, a simple re-threading resolves tension issues without needing adjustments. Always use the correct type and weight of thread recommended for your fabric. Incorrect thread can exacerbate threading problems and create uneven tension. Double-check everything before proceeding with tension adjustments.
Looper Timing and Tension
Precise looper timing is fundamental to achieving balanced tension on the Juki MO-6716S. If the loopers aren’t synchronized, it creates inconsistent stitch formation and tension imbalances, regardless of tension settings. Incorrect timing manifests as skipped stitches, puckering, or uneven loop formation.
Looper timing adjustments are complex and generally require a qualified technician. Attempting to adjust timing without proper knowledge can cause further damage to the machine. However, visually inspect the loopers for any signs of damage or misalignment. Ensure the loopers move freely and smoothly without obstruction.
A misaligned or damaged looper will necessitate professional repair or replacement. While tension adjustments can temporarily mask timing issues, they won’t resolve the underlying problem. Regular maintenance, including looper inspection, helps prevent timing drift. Prioritize professional servicing for timing-related concerns;
Needle and Thread Compatibility
Selecting the correct needle and thread combination is paramount for optimal tension and stitch quality on the Juki MO-6716S. Using incompatible components leads to tension issues, thread breakage, and skipped stitches. The needle size must correspond to the thread weight and fabric type.
Heavier fabrics require larger needles and stronger threads, while lighter fabrics demand finer needles and delicate threads. Polyester threads generally perform well with universal needles, but specialized needles are needed for stretch fabrics or metallic threads. Always refer to the thread manufacturer’s recommendations for needle size.
Ensure the needle is correctly inserted and in good condition – a bent or damaged needle disrupts the loop formation and causes tension problems. Regularly replace needles to maintain consistent stitch quality. Experimenting with different thread brands and needle types can fine-tune tension for specific projects. Prioritize quality components for reliable performance.
Oil Change and Machine Maintenance
Regular oiling is crucial for the Juki MO-6716S, ensuring smooth operation and preventing tension issues. Insufficient lubrication causes friction, leading to inconsistent stitch formation and potential damage. Use only Juki-approved serger oil, as other oils can gum up the mechanism. Apply oil sparingly to designated oiling points, as indicated in the machine’s manual.
Beyond oiling, routine maintenance includes cleaning lint and dust from the machine’s interior. Accumulated lint disrupts loop formation and affects tension. Use a soft brush or compressed air to remove debris. Inspect the blades for sharpness and replace them when necessary – dull blades cause skipped stitches and uneven cutting.
Periodically check the belt for wear and tear, replacing it if it’s cracked or stretched. Proper maintenance extends the machine’s lifespan and maintains consistent tension, minimizing the need for frequent adjustments. A well-maintained serger delivers professional-quality results.
Juki MO-6716S Specific Tension Settings

Initial settings for the Juki MO-6716S often serve as a starting point, requiring adjustments based on fabric type and thread weight. Generally, the needle tension begins around 3-4, the upper looper at 2-3, and the lower looper at 6-8. These values are merely guidelines; testing is essential.
For lightweight fabrics, reduce needle tension slightly and increase looper tensions. Conversely, heavier fabrics typically require increased needle tension and reduced looper tensions. Polyester threads often demand lower tension settings than cotton. Always test on a scrap of the actual fabric and thread combination.
The safety stitch tension, crucial for preventing unraveling, usually sits around 5-7. Fine-tuning involves observing the stitch formation – a balanced stitch lies flat, while imbalances indicate tension adjustments are needed. Documenting successful settings for different fabric/thread combinations saves time and ensures consistent results.
Resources for Further Assistance
Numerous online resources cater to Juki MO-6716S users seeking tension adjustment guidance. YouTube hosts several instructional videos demonstrating threading procedures and tension fine-tuning, including specific examples for the blue looper tension. Search terms like “Juki MO-6716S tension” yield relevant results.
Online sewing forums, such as those dedicated to sergers or Juki machines, provide platforms for asking questions and sharing experiences. Experienced users often offer valuable insights and troubleshooting tips. Juki’s official website may contain downloadable manuals and FAQs, though detailed tension guides are sometimes limited.
Local sewing machine dealers frequently offer classes or repair services, providing personalized assistance. Consider contacting a qualified technician for complex issues or if you’re uncomfortable performing adjustments yourself. Remember to have your machine’s model number and a description of the problem ready when seeking help.
Safety Precautions During Adjustment
Prioritize safety when adjusting the Juki MO-6716S serger’s tension. Always disconnect the power cord from the electrical outlet before performing any maintenance or adjustments. Never attempt to adjust the machine while it is running, as moving parts pose a significant risk of injury.

Exercise caution around needles and blades, which are extremely sharp. Avoid touching these components during and after adjustments. Keep fingers clear of the looper area while testing tension changes. Wear safety glasses to protect your eyes from flying debris or thread fragments.

If you are unfamiliar with serger mechanics, seek guidance from a qualified technician. Do not force any adjustments, as this could damage the machine. Refer to the owner’s manual for specific safety instructions and warnings. Ensure adequate lighting to clearly see all components during the adjustment process.
Understanding MO as a Unit of Data Measurement
While seemingly unrelated to serger tension, “MO” frequently appears in digital contexts as a unit of data measurement, representing Mega Octets. This differs from MB (MegaBytes) and Mb (MegaBits), often causing confusion. One MegaByte typically comprises eight MegaBits, highlighting the importance of distinguishing between these units.
In the realm of digital storage, understanding these measurements is crucial when discussing file sizes and data transfer rates. For example, a larger file size, measured in MO or MB, will require more storage space and potentially longer transfer times. However, within the context of the Juki MO-6716S, “MO” simply denotes the model number of the serger itself.
The prevalence of “MO” as a data unit stems from its use in various computing systems and online platforms. Recognizing this distinction prevents misinterpretations when encountering the term alongside serger-related information. Ultimately, the “MO” in Juki MO-6716S signifies a specific machine model, not a data quantity.